Un-bug-lievable: The Ultimate Guide to Tar and Bug Removal
Why Bug and Tar Removal Matters for Your Car's Health
Bug and tar removal is essential for protecting your vehicle's paint from permanent damage. Here's what you need to know:
Quick Answer:
- To remove fresh bugs, spray the area with a bug remover, let it sit for 30-60 seconds, and wipe gently with a microfiber cloth.
- For dried bugs, apply the remover and allow a longer dwell time of 1-2 minutes, then use a soft scrub mitt with linear motions.
- To clean tar spots, apply tar remover directly to the spots, let it dissolve for 1 minute, and then wipe it away with a clean cloth.
- For tree sap, use rubbing alcohol on a cloth, let it sit for 10 minutes to soften the sap, and then lift it gently.
- Always remember to rinse the area thoroughly and wash the entire vehicle afterward.
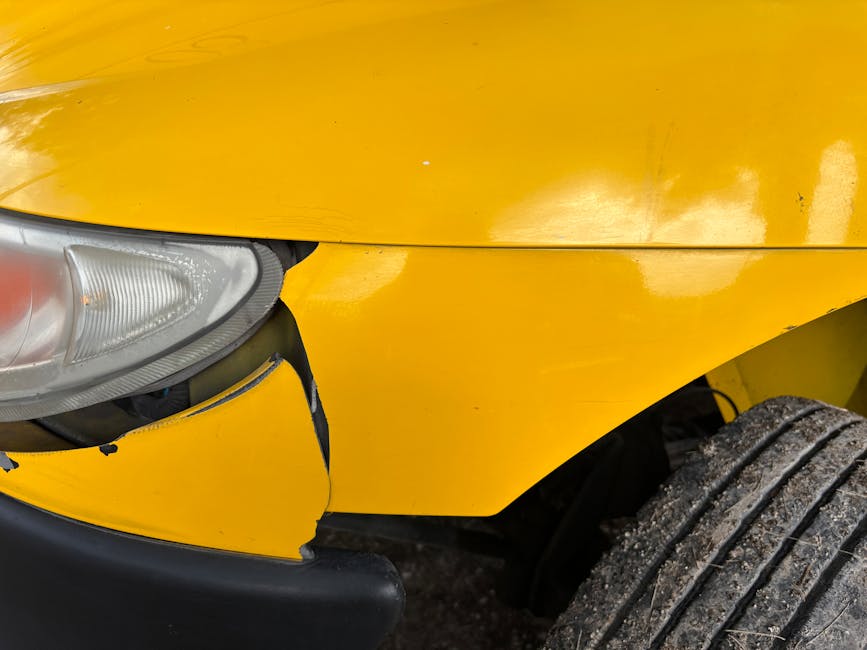
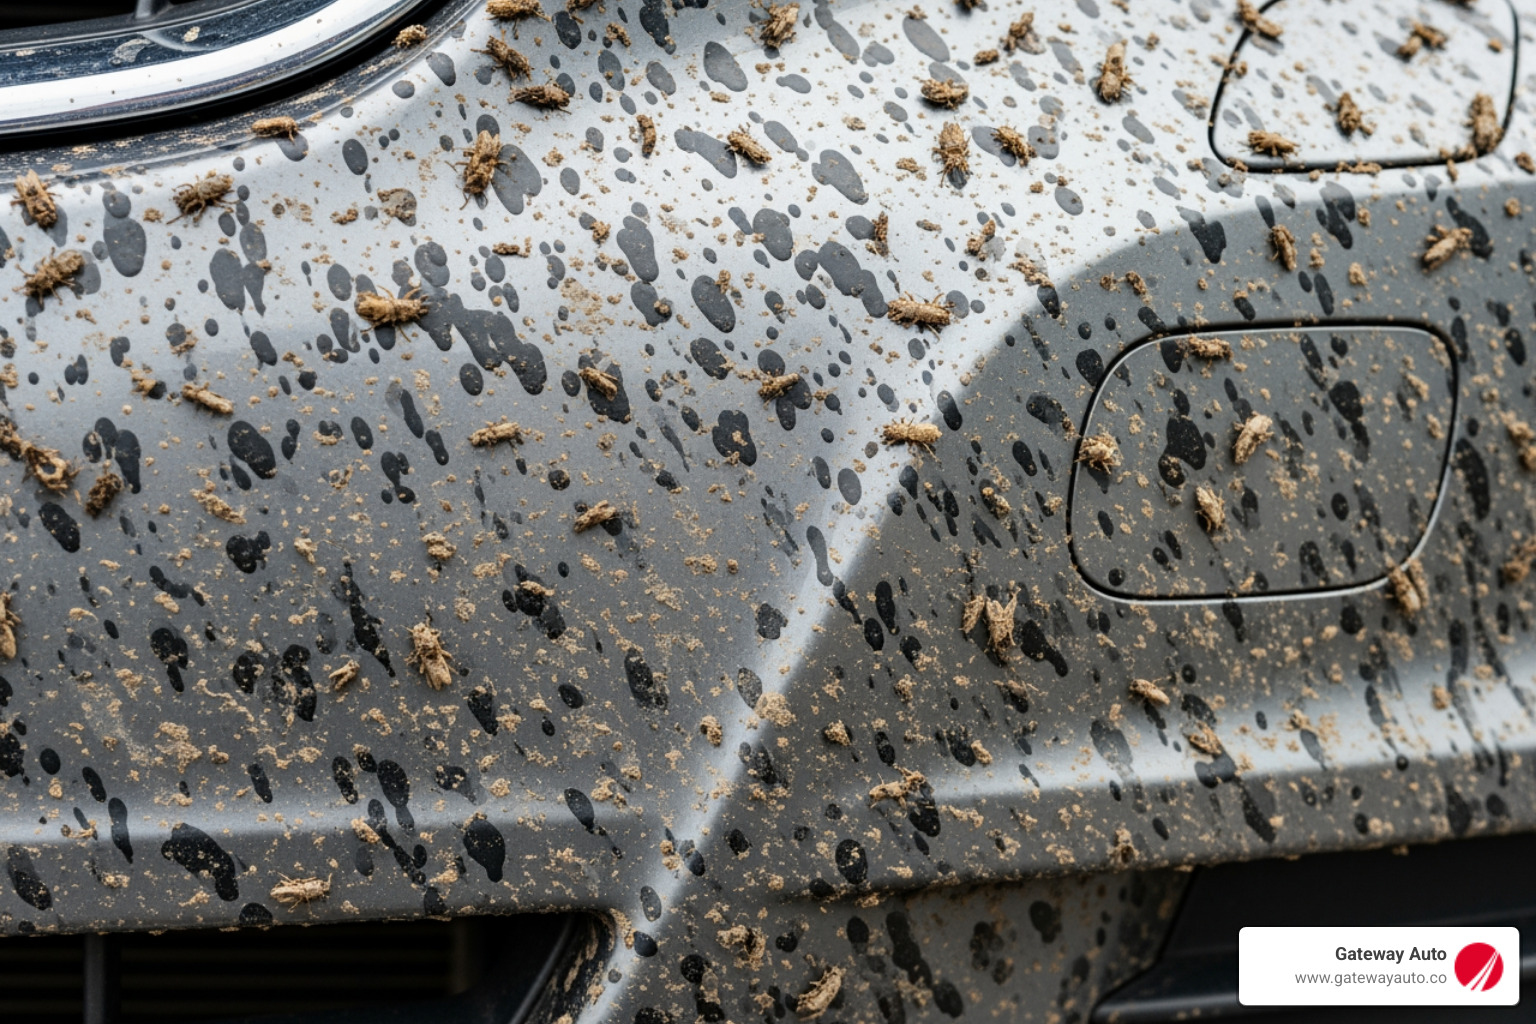
Bug splatter on your car's front bumper and hood isn't just an eyesore—it's highly corrosive. As insect remains decompose, they release enzymes that break down their carcasses. Unfortunately, these same enzymes also eat away at your vehicle's clear coat and paint, leading to unsightly etching and long-term damage.
The problem gets worse the longer you wait. Bug "juices" can dry into your car's paint, and if you wait long enough to clean your car, it can be very difficult to remove the bugs without taking off a little paint as well. If you go on a road trip or drive on country roads and pick up a lot of bugs, clean off your car within a day or two of getting back.
Tar and tree sap are equally destructive. Your vehicle regularly encounters tar, tree sap, and bird droppings—all of which can severely damage the paint if left untreated. The good news? Of the three sticky substances that can dry on your car—bugs, sap, and tar—tar is actually the easiest to remove.
I'm Ben Toscano, and over the past 20+ years building Gateway Auto in Omaha, I've seen how Nebraska's country roads and highway driving leave vehicles covered in bug splatter and tar. Through professional bug and tar removal services and helping thousands of local customers protect their vehicles, I've learned exactly what works—and what damages paint.

Gearing Up: Your Essential Removal Toolkit
Before we dive into the nitty-gritty of getting your ride sparkling clean, let's talk about preparation. Having the right tools isn't just about making the job easier; it's about doing it safely and effectively, protecting your vehicle's finish in the process. Think of it as preparing for battle against those pesky bugs and stubborn tar spots!
Here’s our essential toolkit for top-notch bug and tar removal:
- Commercial Bug and Tar Remover. This is your heavy hitter. Look for a product specifically formulated for automotive use, ensuring it’s safe for clear coats. Many modern removers are designed to dissolve and lift contaminants without harming your paint. Always double-check the label!
- Microfiber Towels. These are your best friends. Microfiber is gentle yet effective, preventing scratches and swirl marks that coarser towels can cause. You'll need several clean ones—one for application, one for wiping, and maybe an extra for emergencies.
- Car Wash Soap. A good quality, pH-neutral car wash soap is essential for the final wash to remove any residue from the specialized removers.
- Wash Mitt. Opt for a soft, non-abrasive wash mitt. This will allow you to gently agitate surfaces without marring the paint, especially when dealing with heavier bug or tar buildup.
- Two Buckets with Dirt Traps. This is a pro tip for preventing swirl marks. One bucket is for your soapy wash solution, the other for rinsing your mitt. The dirt traps sit at the bottom, keeping abrasive particles away from your mitt and, more importantly, away from your paint.
- Clay Bar. For those truly stubborn, embedded contaminants that even the best removers can't tackle alone, a detailing clay bar is a miracle worker. It safely lifts grime from the paint surface.
- Clay Lubricant. This is non-negotiable if you’re using a clay bar. Applying a generous amount of lubricant creates a slick surface, allowing the clay to glide smoothly and prevent it from marring the paint.
- Drying Towel. A large, plush microfiber drying towel will help you dry your vehicle quickly and streak-free after the final wash, preventing unsightly water spots.
The goal is always to be gentle. Our vehicle's paint is delicate, and a little patience with the right tools goes a long way in preserving its shine.

The Complete Bug and Tar Removal Process: A Step-by-Step Guide
Alright, gear in hand, it’s time to get down to business! Whether you’re dealing with a fresh splattering from a scenic drive through rural Nebraska or stubborn tar specks from road construction around Omaha, we’ve got you covered. The key to successful bug and tar removal is a systematic approach.
First things first: preparation. We always recommend working in a shaded area, out of direct sunlight, and ensuring your vehicle's surfaces are cool to the touch. Why? Because cleaning products can dry too quickly on hot surfaces, potentially leaving streaks or even etching. A quick pre-rinse with water will also help remove any loose dirt and debris, preventing scratches during the cleaning process.
For a comprehensive guide to removing contaminants, you can also check out this resource: A comprehensive guide to removing contaminants.

Tackling Fresh and Dried Bug Splatter
Bug splatter is arguably the most common and corrosive enemy of your car's paint. Those little bug guts are packed with enzymes that, as they decompose, literally eat away at your clear coat. That's why prompt action is crucial!
For Fresh Bug Splatters. If you catch them early, within a day or two of your drive, they're usually a breeze to remove.
- Spray. Lightly mist the affected area with a dedicated bug remover or a quick detailer spray.
- Dwell Time. Let the product sit for about 30 to 60 seconds. This gives it time to soften the bug residue.
- Wipe Gently. With a clean, soft microfiber towel, gently wipe away the softened bugs. Use a straight, linear motion rather than circular to avoid creating swirl marks. If the towel gets dirty, flip to a clean side or grab a fresh one.
- Rinse. Give the area a quick rinse with water.
For Stubborn or Dried Bug Residue. These require a bit more muscle (but still gentle!) and patience. If bug "juices" have dried into your car's paint, it can be quite challenging to remove them without damaging the paint.
- Pre-soak. For heavy buildup, consider a thorough car wash first to loosen as much as possible.
- Apply Bug Remover Generously. Spray your bug remover directly onto the dried splatters. For really stubborn spots, you might need a more concentrated product or a longer dwell time, perhaps 1 to 2 minutes. Always check the product's instructions.
- Gentle Agitation. Instead of just wiping, use a non-abrasive scrub sponge or a mesh wash mitt (like the ones designed for bug removal). With very light pressure and linear motions, gently agitate the area. The goal is to lift the residue, not scrub it off aggressively.
- Rinse Thoroughly. After working a section, rinse it completely with water to remove all bug residue and cleaning product. Repeat the process if necessary on any remaining spots.
The quicker you act, the less corrosive damage those bug splatters will inflict on your paint!
Erasing Stubborn Tar Spots
Compared to bugs and sap, tar is often the easiest of the three sticky substances to remove, which is a small victory for our paint! Tar's oil-based nature means it responds well to specific types of cleaners.
- Spot Treatment. Tar usually appears as small, black specks, often on lower body panels. We recommend treating these spots individually rather than saturating large areas.
- Apply Tar Remover. Spray a dedicated automotive tar remover directly onto the tar spots.
- Dwell Time. Allow the product to dwell for about 1 minute. You should see the tar begin to dissolve or "bleed" from the paint. This is the remover doing its job!
- Wipe Away Residue. With a clean microfiber towel, gently wipe the softened tar away. If the towel gets black, fold it to a clean section or use a fresh towel to avoid spreading the tar or scratching the paint.
- Repeat if Necessary. For thicker or more stubborn tar, you might need to repeat the application and wiping process.
- Avoid Harsh Scrubbing. Never scrub aggressively at tar. Let the chemical do the work. Excessive scrubbing can push the tar further into the paint or create scratches.
Safely Dissolving Tree Sap
Tree sap, especially here in Nebraska, can be a real headache. It can quickly build up into a thick, hard layer and, if left untreated, can crystallize and permanently etch or scratch your paint. We recommend cleaning sap off every other week or so, and even more often in the summer when it's more concentrated.
- Soften the Sap. The key to sap removal is softening it first. Apply rubbing alcohol (isopropyl alcohol) to a clean microfiber cloth.
- Apply to Sap. Gently place the alcohol-soaked cloth over the sap spot and let it sit for at least 10 minutes. This allows the alcohol to begin breaking down the sap's structure.
- Careful Lifting. After the dwell time, gently wipe and lift the softened sap away. Avoid rubbing vigorously. If the sap is still stubborn, reapply the alcohol and let it soak longer.
- Removing from Glass vs. Paint.
- On Paint. Rubbing alcohol is generally safe for paint when used sparingly and rinsed quickly. However, always test on an inconspicuous area first. WD-40 can also be effective for sap on paint, but must be washed off immediately afterward.
- On Glass. Rubbing alcohol works well on glass. For very dried, hardened sap on windows, you can carefully use a new razor blade at a very shallow angle to scrape it off, but never attempt this on painted surfaces! Avoid using WD-40 on glass as it can leave a greasy film that’s hard to remove.
- Rinse. Always rinse the area thoroughly with water after sap removal to ensure no residue remains.
Pro Tips and Common Mistakes
Our goal at Gateway Auto is always to help you protect your investment. When it comes to bug and tar removal, knowing the right techniques can save you from costly paint correction down the line. It's about working smarter, not harder, to maintain that showroom shine. For more info about premium detailing services, check out our blog: More info about premium detailing services.
DIY Solutions for Bug and Tar Removal
While commercial products are often the most effective and safest bet, sometimes you’re in a pinch or prefer household alternatives. Here are a few DIY solutions we’ve seen used, along with some important caveats:
- WD-40 on Paint (with extreme caution). Yes, WD-40 can dissolve bugs and tar thanks to its lubricating and solvent properties. However, it’s crucial to use it sparingly, apply it only to the affected area, and immediately wash it off with car soap and water afterward. Never use WD-40 on your windshield or other glass surfaces, as it can leave a difficult-to-remove oily film.
- Peanut Butter for Tar. Believe it or not, the oils in peanut butter can help break down tar. Apply a thin layer to the tar spot, let it sit for a minute, then gently wipe away. Again, follow up with a thorough wash.
- Rubbing Alcohol for Sap. As mentioned earlier, rubbing alcohol is an excellent and readily available solution for tree sap. Always test on an inconspicuous spot first.
- Degreasing Dish Soap (for pre-soak, not regular wash). While harsh dish soaps can strip wax and dry out paint if used regularly, a very diluted solution can sometimes be used as a pre-soak for heavily bug-splattered areas to help loosen grime before using a dedicated bug remover. Rinse thoroughly!
Our Golden Rule for DIY: Always, always test any homemade solution on a small, inconspicuous area of your vehicle first to ensure it doesn't damage your paint or finish. Better safe than sorry!
Effective Techniques for Stubborn Bug and Tar Removal
Sometimes, even after trying specialized removers, you might encounter a few stubborn spots that just won't budge. This is where the detailing clay bar comes into play—it's like magic for embedded contaminants!
- The Detailing Clay Bar. This isn't just for overspray anymore; it's incredibly effective at lifting tree sap, tar, and even deeply embedded bug residue that has bonded to your paint. The clay safely pulls these contaminants off the surface without abrasive scrubbing.
- Clay Lubricant is Key. We cannot stress this enough: always use plenty of clay lubricant! Never use a clay bar on a dry surface. The lubricant creates a slippery barrier, allowing the clay to glide smoothly over the paint and preventing it from scratching or marring the finish.
- Gliding Motion. Spray the affected area generously with clay lubricant. Flatten a piece of clay in your hand and gently glide it back and forth over the lubricated surface. You'll feel it pick up the contaminants.
- Re-folding the Clay. As the clay picks up grime, it will become dirty. Frequently reshape and re-fold the clay to expose a clean section. If the clay becomes too dirty or drops on the ground, discard it, as it can pick up abrasive particles.
- When to Use a Clay Bar. We recommend using a clay bar after a thorough wash, once you've removed the majority of surface bugs and tar. It's the final step for truly clean, smooth paint before applying protection. Detailing clay is also safe for glass and metal surfaces when used with ample lubricant.
The Post-Clean Wash and Dry
You've successfully conquered the bugs, tar, and sap—hooray! But your job isn't quite done. The final steps are crucial for ensuring your paint is protected and looking its best.
- Washing the Entire Vehicle. After using specialized bug and tar removers, it’s essential to wash your entire vehicle thoroughly. This removes any lingering chemical residues that could potentially harm your paint if left to dry. Use your two-bucket method with pH-neutral car soap to ensure all surfaces are clean and neutralized.
- Proper Drying. Once washed, promptly dry your vehicle with a clean, soft microfiber drying towel. This prevents water spots, which can be particularly noticeable here in Omaha due to our water hardness. Gently blot or wipe, rather than dragging, to avoid introducing new scratches.
Prevention: The Best Way to Protect Your Paint
An ounce of prevention is worth a pound of cure, especially when it comes to your vehicle's paint! While we're experts in bug and tar removal, we'd much rather help you prevent the problem in the first place. The best defense against these corrosive culprits is a strong protective layer.
- Protective Layers. Think of waxes, sealants, and ceramic coatings as invisible shields for your paint. They create a barrier between your clear coat and the harsh elements, making it much harder for bugs, tar, and sap to bond securely.
- Car Wax and Paint Sealant. Applying a high-quality car wax or paint sealant after cleaning your vehicle creates a super slick surface. This slipperiness makes it difficult for contaminants to adhere, and if they do stick, it significantly weakens their bond, making them much easier to remove during your next wash. We recommend regular waxing or sealing, especially before long road trips or during bug season here in Nebraska.
- Ceramic Coatings. For the ultimate in long-lasting protection, consider a professional ceramic coating. These advanced coatings bond at a molecular level with your paint, providing exceptional slickness, hydrophobicity (water repellency), and resistance to environmental contaminants. This means bugs, tar, and sap will struggle to stick, and when they do, they’ll wipe off with minimal effort, offering superior defense against etching.
- Regular Washing. Beyond protective layers, simply washing your car regularly is a powerful preventative measure. Frequent washes prevent bugs, tar, and sap from hardening and bonding deeply with your paint. The sooner you wash them off, the less time they have to cause damage.
By taking these preventative steps, you'll spend less time battling stubborn stains and more time enjoying that pristine finish on your vehicle.
Frequently Asked Questions about Bug and Tar Removal
We often get asked similar questions by our customers in Omaha and La Vista. Here are some of the most common inquiries about bug and tar removal, along with our expert advice:
How often should I remove bugs and tar?
The golden rule is: as soon as possible!
- For Bugs. We highly recommend removing bug splatters within a day or two of getting them, especially after a long drive or during warmer months. As insect remains decompose, they release corrosive enzymes that can quickly etch your paint's clear coat. The longer they sit, the harder they become to remove without potential damage.
- For Tar. While tar is generally easier to remove than bugs or sap, it's still best to tackle it as soon as you notice it. Fresh tar comes off much more easily than tar that has baked onto your paint for days.
- For Sap. If your car is frequently parked under trees (a common occurrence in many Nebraska neighborhoods!), plan to clean off sap every other week or so. During the summer, when sap is more concentrated and sticky, you might need to do it even more often. Sap can quickly harden into a thick layer and crystallize, potentially scratching your paint.
Think of it as routine maintenance: the more proactive you are, the less effort (and expense) you'll need for deeper cleaning or paint correction.
Are bug and tar removers safe for all surfaces?
This is a critical question, and the answer is: always check the product label!
- Clear Coats. Most quality commercial bug and tar removers are specifically formulated to be safe for automotive clear coats and painted surfaces. They are designed to break down organic matter and petroleum-based contaminants without harming the underlying finish.
- Vinyl Wraps. Many bug and tar removers are safe for vinyl wraps, but it’s crucial to verify this on the product's instructions. When in doubt, perform a spot test in an inconspicuous area.
- Ceramic Coatings. Good news here! Quality bug and tar removers are generally compatible with ceramic coatings and will not strip or harm the coating. In fact, they help maintain the coating's integrity by removing contaminants that could otherwise impede its performance.
- Glass. Most dedicated bug and tar removers are safe for glass. However, as we mentioned earlier, avoid using WD-40 on glass as it can leave a stubborn, greasy film.
- Plastics and Rubber. Exercise caution. Some harsh solvents can dry out or stain unpainted plastics and rubber trim. Avoid prolonged contact, and if you do get product on these surfaces, wipe it off quickly and rinse thoroughly.
When in doubt, always err on the side of caution and test the product on a small, hidden area first.
What's the biggest mistake to avoid?
If we had to pick one biggest mistake that car owners make during bug and tar removal, it would be aggressive scrubbing with abrasive tools.
Here’s why it’s a big no-no, along with other common pitfalls:
- Scrubbing Too Hard or Using Abrasive Tools. This is the quickest way to inflict permanent damage on your paint. Using sponges with a rough texture, household scrubbers, or even dry towels will introduce scratches, swirl marks, and hazing that can be costly to remove. Always use soft microfiber towels, gentle wash mitts, or specialized bug sponges with light, linear pressure. Let the chemicals do the work!
- Letting Chemicals Dry on the Surface. Never allow bug and tar removers, or any cleaning chemical, to dry on your paint. They are designed to dissolve contaminants, and if they dry, they can leave behind stubborn residues, streaks, or even etch the clear coat. Work in small sections and rinse thoroughly after the recommended dwell time (usually 30-60 seconds).
- Working in Direct Sunlight or on Hot Surfaces. This goes hand-in-hand with chemicals drying too quickly. Hot paint accelerates evaporation, making it nearly impossible for products to work effectively and increasing the risk of streaking or staining. Always work in the shade and ensure your vehicle's surfaces are cool.
- Neglecting to Wash the Car Afterward. Skipping the final wash after spot-treating bugs and tar is a recipe for disaster. Lingering chemical residues can attract more dirt, break down protective waxes, or even lead to paint damage over time. A full wash and rinse are essential to neutralize the surface.
By avoiding these common mistakes, you'll ensure your bug and tar removal efforts are effective and, most importantly, safe for your vehicle's precious paint.
Conclusion: Keep Your Ride Looking Showroom-Ready
Maintaining your vehicle's exterior isn't just about aesthetics; it's about preserving its value and protecting your investment. Effective and timely bug and tar removal plays a crucial role in preventing permanent paint damage, etching, and corrosion caused by everyday road grime. By understanding the right techniques, using appropriate tools, and taking preventative measures, you can keep your car looking as pristine as the day you drove it off the lot.
We hope this guide empowers you to tackle those pesky bug splatters and stubborn tar spots with confidence. But if you prefer to leave the detailed cleaning to the pros, we're always here to help. For a professional touch that ensures your vehicle receives the highest level of care, Gateway Auto offers expert detailing services right here in Omaha. We’ll handle the grime so you can simply enjoy the ride.
Schedule your professional auto detailing service with us today and let us bring back that showroom shine!
All your automotive needs under one roof
Gateway Auto offers service, collision, fleet and quality vehicle sales under the same trusted brand to ensure you stay on the road with a team by your side.